INSTALLATION GUIDE
Carwash lighting
STRADA-2X2 INSTALLATION GUIDE
The following instructions should be observed before using the product to ensure reliable assembly. Fastening can be done by using screw, tape or adhesive. Recommended operating temperature (PMMA) is -40°C to +80°C.
1. Heat sink machining
2. PCB Layout
3. Screw requirements
4. Assembly
5. Fastening
1. Heat sink machining
• Cable holes and screw thread holes must be done before lens assembly.
• Ensure that anodized heat sink surface is even
• Correct thickness of the PCB is 1.6 mm (position pin lenght 1.1 mm)
• Screw thread hole accuracy is +-0.1 mm
• Screw vertical straightness tolerance is +-⊥0.1 mm A
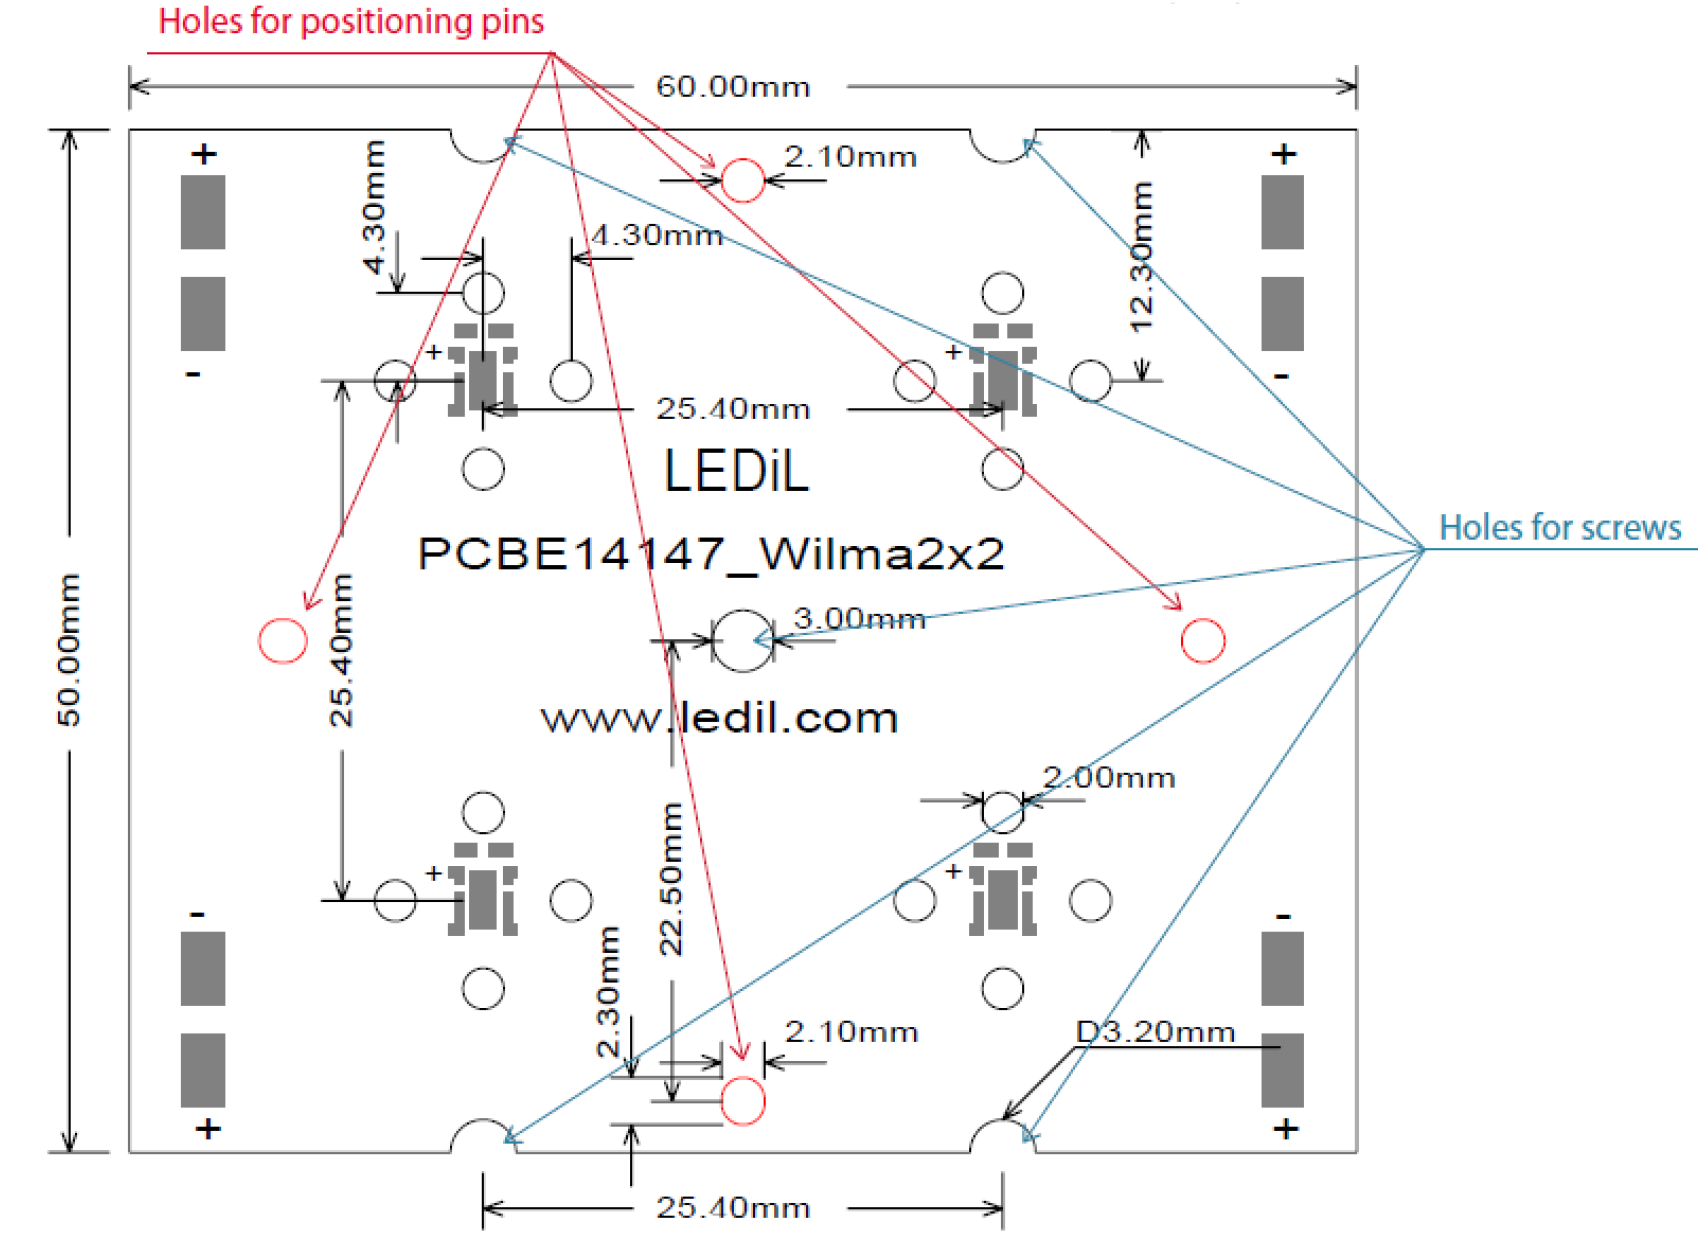
2. PCB Layout
• Minimum of two (2) position pin holes are needed for accurate lens assembly, depending on the desired direction of the lens
• If fastened with screws, at least one (1) is needed to attach lens from the middle, other four (4) places on the sides are optional
• Recommended widht for position pin holes is 2.10 mm (-0 mm +0.1 mm)
• Other position pin hole is oblong shaped, for the plus pin is for alignment and the minus pin prevents the lens from twisting
Screws
• Maximum tightening torque for the center screw is 0.6 Nm
• At least one screw (1) is needed to attach lens from the middle, other four (4) places on the sides are optional
• Side optional four screw tightening torque need to define during assembly
– Depending screw support
• Note that when using screws for fastening, there can’t be anything flexible material between the lens and the PCB, for it my cause the lens to bend or crack Tape
• Recommended to use LEDiL tape C14151_STRADA-2X2-TAPE
• Tapes can be used to absorb some of the vibration
The information contained herein is the property of LEDiL Oy, Salorankatu 10, FI-24240 SALO, Finland and is subject to change without notice.
Please visit www.ledil.com for additional information, such as the latest photometric files, 3D mechanical models, and application notes relating to handling, gluing and taping.