INSTALLATION GUIDE
FLORENCE-1R-MAXI-WG Installation guide and fixture design tips
RELATED CONTENT:

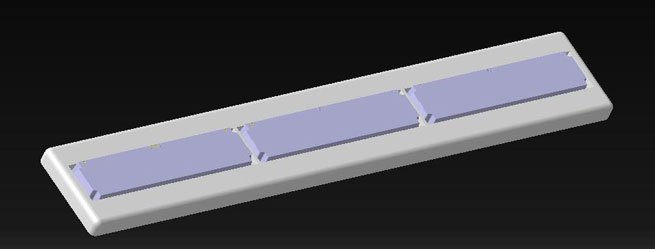
F14487_FLORENCE-1R-MAXI-WG
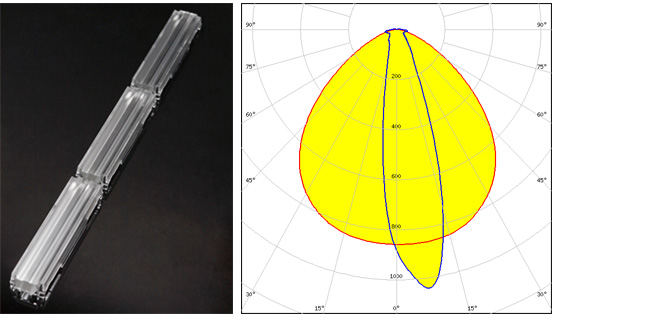
- Asymmetric oval light pattern
- Precision-molded from optical grade PMMA – UL94 HB rated material with operating rating -40°C to +80°C
- Dedicated installation clips available for quick and reliable fastening
- Uniform wall performance with optimal vertical depth and horizontal wideness
- No tilting required and illumination starts already from the mounting level
- Can be used as single unit to highlight a certain zone of the wall or as continuous line for overall wall wash illumination
- Good color balance with high power, and adequate color balance with mid-power LEDs (minimal or minor yellow nuance)
- Compatible with a range of mid- and high-power LEDs up to 5630 package size
WALL WASHING SETUP
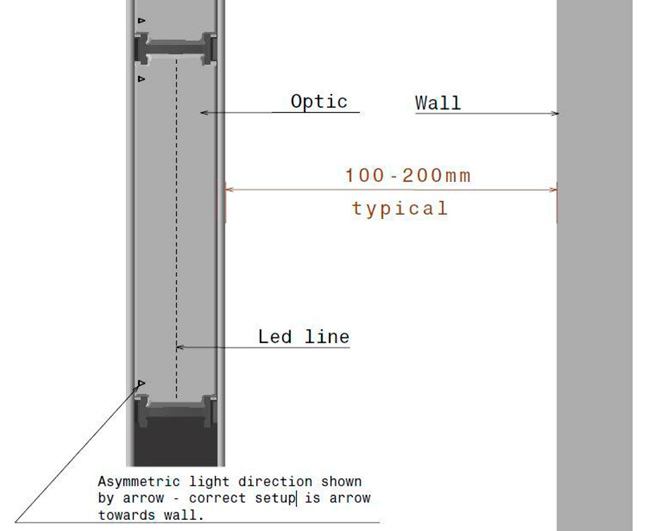
Typical starting point for creating wall washing setup for 2-3 meter wall is to place F14487_FLORENCE-1R-MAXI-WG in 10…20 cm distance from the wall and taking into account asymmetric light direction (shown by arrow in the lens).OPTIMAL DISTANCE BETWEEN OPTIC AND WALL DEPENDS ON:
- Exact wall height
- Desired illumination balance between roof and floor areas (For example 20 cm setup allows more open and vertically deeper light appearance while 10 cm provides higher max lux level)
- Interior decoration requirements for lamp placing
- Preferred atmosphere in the room (adjusting vertical depth of illumination)
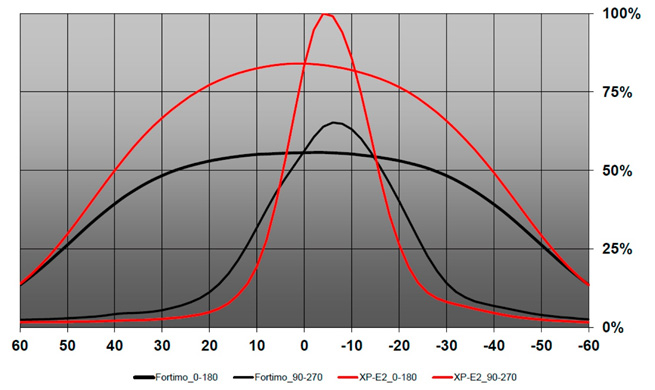
PERFORMANCE DIFFERENCE BETWEEN HIGH POWER AND MID POWER USE
Typically using high power LED allows better CD/LM peak result with only minor differences on total efficiency. In practice CD/LM difference can be noticed on vertical illumination depth in wall washing applications.XP-E2 comparisons to Fortimo 1R LED lines as follows, typically mid power LED peak ~70% from XP-E2 LED type:
REFLECTIONS FROM COMPONENTS AND LIGHT FIXTURE DESIGN
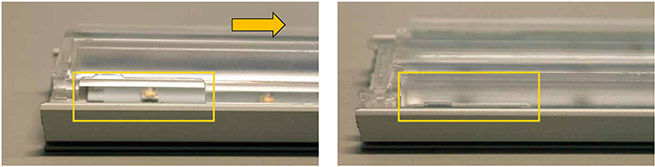
As shape of the photometry allows very close (10-20 cm) installation distance to wall, reflections from components inside lens and wire holes are recommended to be taken care by light fixture design. Recommended examples as follows:Wall side component and wiring outlet covered by lighting fixture

Wall side component and wire outlet covered by recessed mounting
Wall side component and wire hole outlet covered by surrounding frame-holder
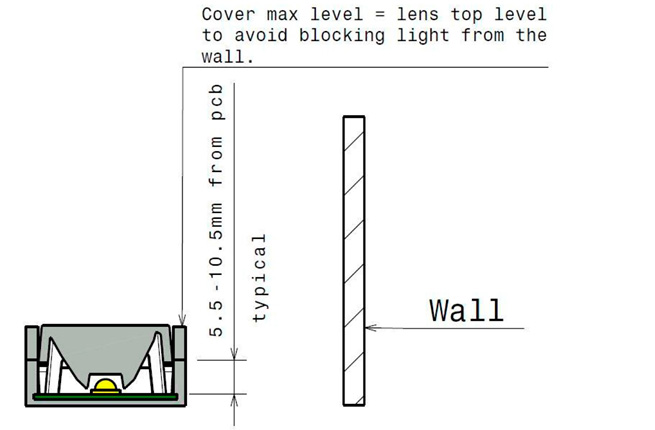
Reflection cover dimension recommendation
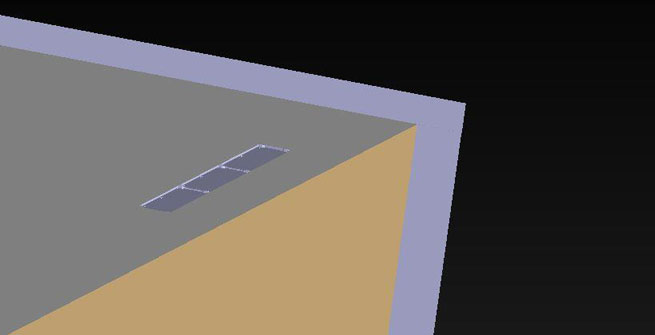
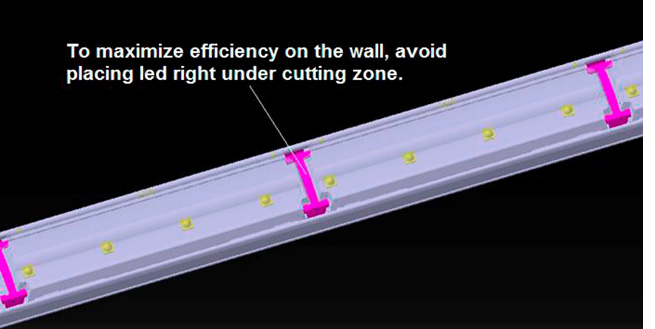
As a guideline following led arrangement provides best efficiency on the wall (obviously not always possible):
ASSEMBLY
Before assembling the product ensure that mounting surface is even and not causing pressure on the light fixture.Slide the lens into the aluminium profile and make sure the whole lens is evened out, so that every hole reserved for connectors are hidden inside the profile.
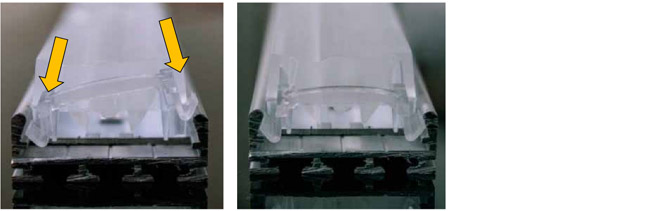
The fastening clips will be installed on both sides of every lens.

Press the clips inside the profile with the help of a flat headed screwdriver.
It may be easier to place one side to its place at first, and then press the other side down.
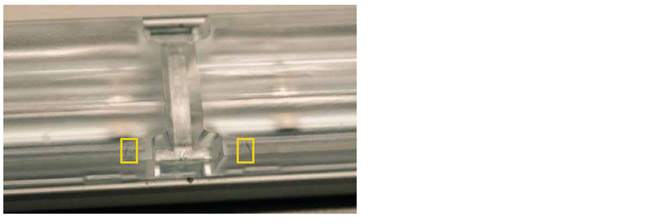
These small arrows on the other side of the lens show direction of the light beam, so make sure they are pointing towards the wall.
Please see available accessories for installation on the product page.
F14487_FLORENCE-1R-MAXI-WG Product page
The information contained herein is the property of LEDiL Oy, Joensuunkatu 13, FI-24100 SALO, Finland and is subject to change without notice. Please visit www.ledil.com for additional information, such as the latest photometric files, 3D mechanical models, and application notes relating to handling, gluing and taping.