
STRADA-IP-2X6 INSTALLATION GUIDE
General information of STRADA-IP-2X6-product assembly. The following instructions should be observed before using product. To ensure reliable assembly, STRADA-IP-2X6 fastening materials (heat sink, screw) need to be suitable for lens attachment.
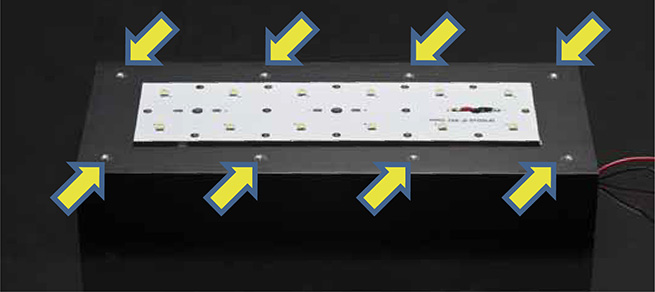
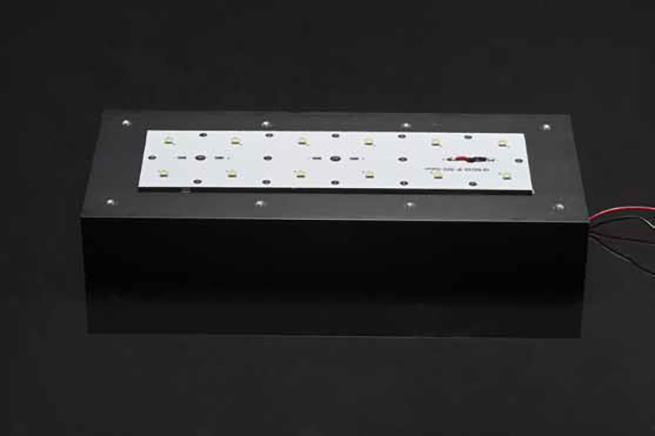
1. HEAT SINK MACHINING
- Cable holes and screw thread holes must be done before lens assembly
- After cable holes and threaded screw holes are machined, ensure that anodized heat sink surface is even
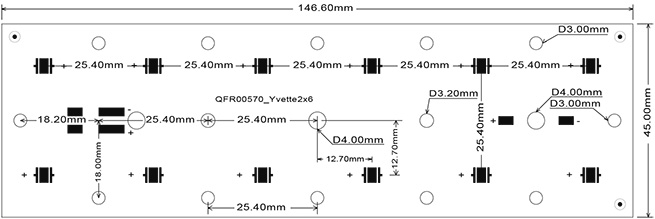
- Correct thickness of the PCB is 1.6 mm
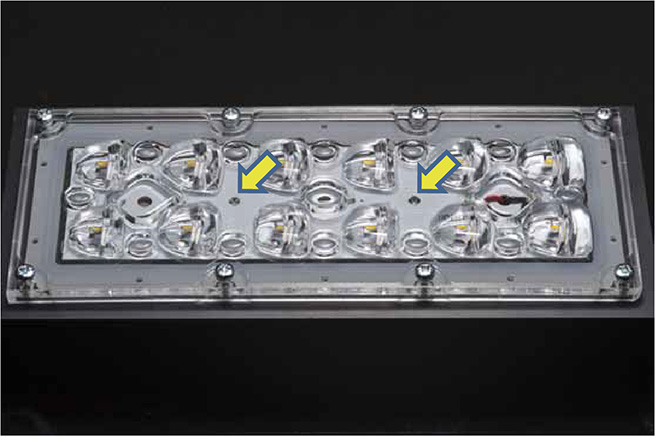
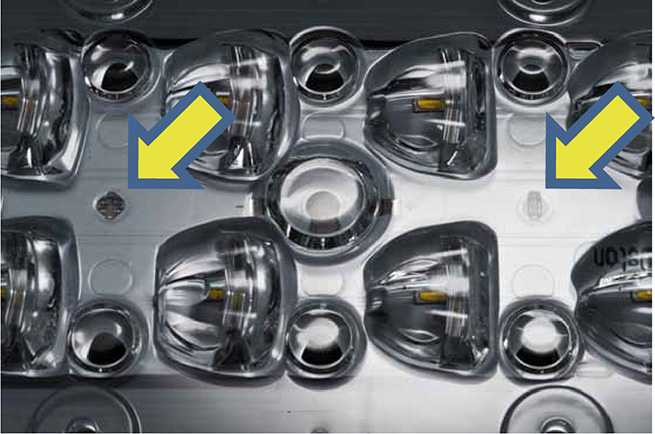
- Screw thread hole accuracy is +-0.1 mm (yellow arrow in picture)
- Screw vertical straightness tolerance is +-⊥0.1 mm A
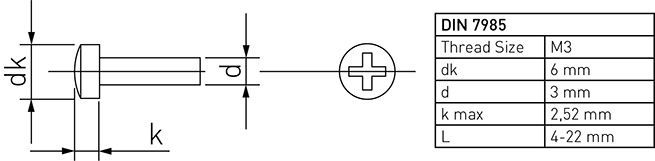
2. SCREW REQUIREMENTS
- STRADA-IP-2X6 lens attachment screws are of type M3. (DIN 7985, ISO 7045/ISO 14583 TX)
- Countersunk screw is not allowed
- Self-tapping screws are not recommended
- Maximum tightening torque of the screws is 0,6 Nm
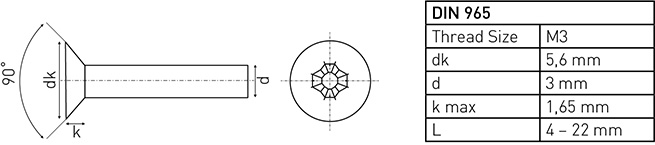
Differing from other STRADA-IP-2X6 lenses, the CS14145_STRADA-IP-2X6-DWC-90 module needs countersunk screws of type M3 (DIN 965) for fastening the PCB to heat sink.
Please note: LEDiL recommends the use of the M3 nylon washers (DIN 125 / ISO 7089) below fastening screws on our STRADA-IP-2X6 modules to minimize stresses induced by torqueing of the screws. Like all PMMA lenses STRADA-IP-2X6 is also prone to environmental stress cracking. Please make sure that chemicals used in the fixture manufacturing do not cause stress cracking risk with PMMA.
3. ASSEMBLY ORDER
- heat sink
- MCPCB with thermal pad or thermal paste
- Make sure that MCPCB wires come through heat sink hole
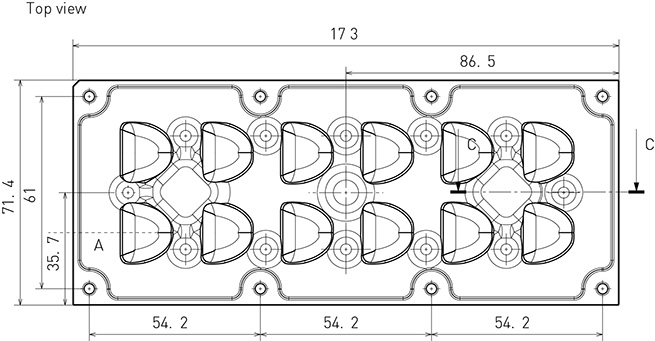
- Lens/silicon seal
- Use lens position pins to align MCPCB.
- Make sure that the seal is positioned appropriately on the lens (Improper positioning of the seal causes risks to both IP protection and cracking of the lens.)
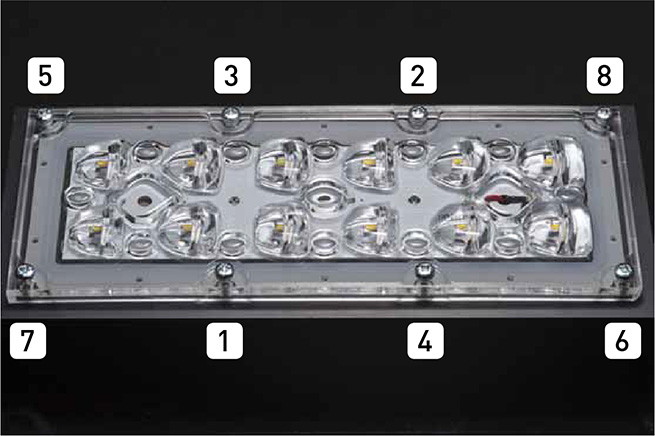
4. SCREW FASTENING
- Install all screws in place before final tightening.
- Max torque 0.6 Nm
- Tightening order

Find all related products
The information contained herein is the property of LEDiL Oy, Joensuunkatu 13, FI-24100 SALO, Finland and is subject to change without notice. Please visit www.ledil.com for additional information, such as the latest photometric files, 3D mechanical models, and application notes relating to handling, gluing and taping.