STELLA-T4 INSTALLATION GUIDE
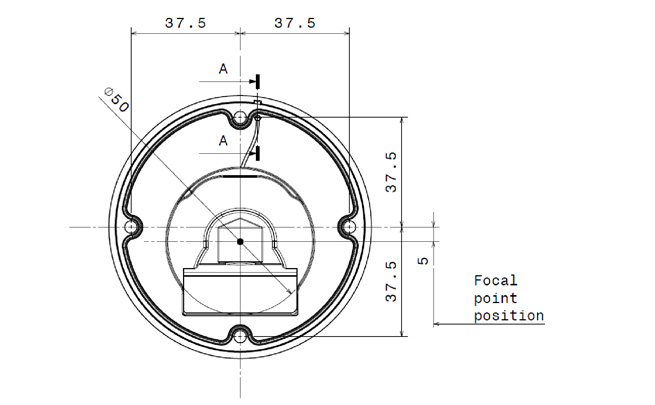
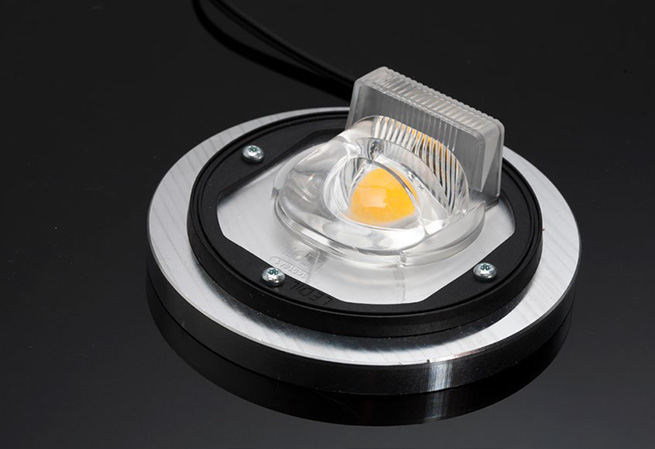
- Please see drawing below for correct fastening hole pattern. Holes have to be deburred. Consult datasheets of COB and connector manufacturers for corresponding hole patterns. COB wiring has to be routed through heat sink underneath the lens in order to not compromise IP rating.
- Align the LED in place so that its center point matches to the lens focal position.
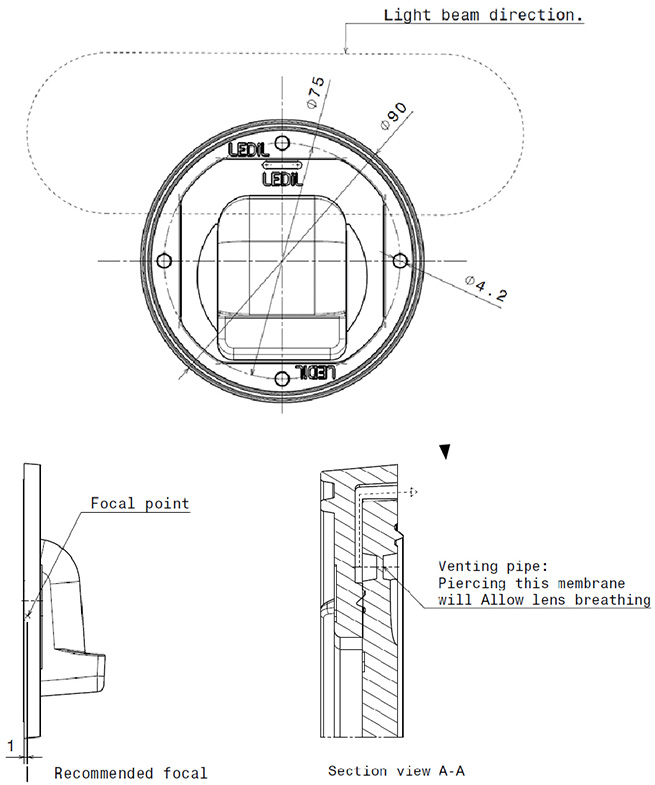
- If more ventilation is needed, pierce the venting pipe open at the lens bottom.
- Place the lens on top. Take note of the beam direction.
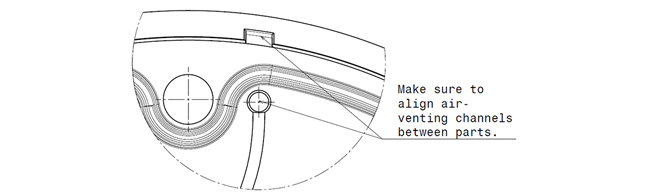
- Put the frame in place and align the air venting channels. Fasten with 0,4Nm and M4 scres.
For more details about the heat sink machining, chemicals, heat control etc. please refer to the LEDiL Installation Guide
FN14645_STELLA-T4 Product Page
FN15187_STELLA-T4 Product Page
The information contained herein is the property of LEDiL Oy, Joensuunkatu 13, FI-24100 SALO, Finland and is subject to change without notice. Please visit www.ledil.com for additional information, such as the latest photometric files, 3D mechanical models, and application notes relating to handling, gluing and taping.